UI Frames
Jump to navigation
Jump to search
The printable version is no longer supported and may have rendering errors. Please update your browser bookmarks and please use the default browser print function instead.
UI Frames deliver the core information that the player will need to play StarCraft II. If you're creating a custom map, you can hide these independently based on your needs via triggers.
Hiding Frames
Here is a list of the frames you can hide through the "Show/Hide UI Frame" action with a description of each one:
- Achievements Menu Button: Hiding this panel hides the button that shows all the possible achievements in-game. (F9)
- Alert Panel: This panel is to the upper-left of your screen. Buttons with their respective 'Alert Tooltip' appear here. For example, when a research or unit is complete.
- Alliance Button: Hiding this panel hides the button at the top right that allows you to change you alliance/shared vision if the map does not have Locked Alliances.
- Battle UI: Only Blizzard maps can use this. This is the blue-colored UI element that shows how many Battle.net 2.0 friends you have online.
- Cash Panel: ??
- Character Sheet Button: ??
- Command Panel: Hiding this hides the command card area at the bottom right of the screen. However, there is still a black box where the command card used to be (hiding the terrain beneath it).
- Credits Panel: ??
- Error Display Panel: This might hides the layer in which Debug Messages are printed. Testing required.
- Help Menu Button: Hiding this panel hides the button at the top left that displays all the tips, tutorials, and tech trees in the specified game. (F12)
- Hero Panel: Hiding this panel hides the image(s) at the right of the screen that displays when you have a "heroes."
- Inventory Panel: This hides the default buttons that are given to a unit above it's command card when it has an Inventory ability.
- Menu Bar: Hiding this panel hides the "Menu" (F10) and "Message Log" (F11) buttons at the top-left of the screen.
- Mercenary Panel: Possibly the panel that allows you to purchase the Mercenaries in the campaign.
- Minimap Panel: Hiding this panel hides the minimap. However, there is still a black box where the minimap used to be (hiding the terrain beneath it).
- Mission Archive Panel: The list of played missions in the Campaign Mode.
- Mission Time Panel: ??
- Objective Panel: Possibly the objectives at the top left of the screen when provided with them.
- Planet Panel: The Planet (Mission) choosing panel in the Campaign mode.
- Purchase Panel: ??
- Research Panel: Possibly the research panel that is available in the Armory at the Campaign Lobby. (Upgrades for units)
- Resource Panel: Hiding this panel hides the mineral and gas display at the top-right of the screen.
- Room Panel: Possibly the 4 buttons at the bottom of the Campaign lobby that allows you to switch areas.
- Supply Frame: Possibly Supply at top right, however IIRC resource panel also hides this. Will test later.
- Team Resource Button: Hiding this panel hides the resource trading button at the top-right that allows you to trade resources with allies.
- Tech Glossary Panel: ??
- Tech Tree Panel: Possibly the research panel that is available in the lab at the Campaign lobby. (Zerg and Protoss specialties for Terran)
- Tip Alert Panel: ??
- Victory Panel: ??
Measuring UI Frames
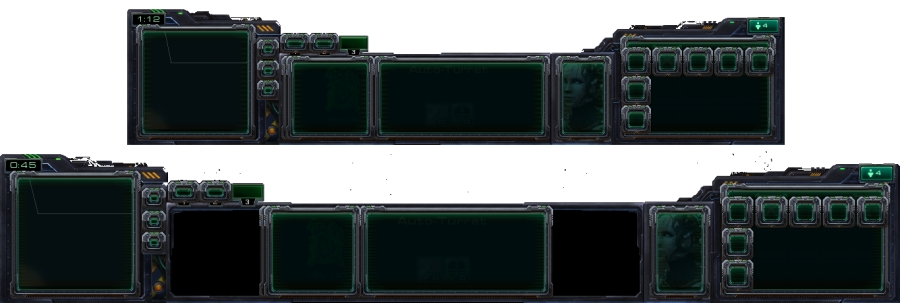
The measurement of the Dialogs may change dramatically for the "Unit Information" due to the different screen sizes.
Mini Map
- Size X: 325
- Size Y: 310
- Offset X: 15
- Offset Y: 10
- Relative To: Bottom Left
Ping
- Size X: 70
- Size Y: 60
- Offset X: 330
- Offset Y: 220
- Relative To: Bottom Left
Terrain
- Size X: 60
- Size Y: 60
- Offset X: 330
- Offset Y: 165
- Relative To: Bottom Left
Color
- Size X: 70
- Size Y: 60
- Offset X: 330
- Offset Y: 115
- Relative To: Bottom Left
Command Card
- Size X: 420
- Size Y: 280
- Offset X: 15
- Offset Y: 10
- Relative To: Bottom Right
- Equation: Moving to the right (Offset X - 80) and Moving downwards (Offset Y - 75).
Portrait
- Size X: 160
- Size Y: 230
- Offset X: 442
- Offset Y: 8
- Relative To: Bottom Right
Unit Information
- Size X: 710
- Size Y: 230
- Offset X: -105
- Offset Y: 8
- Relative To: Bottom
Unit Stats
- Size X: 475
- Size Y: 230
- Offset X: 15
- Offset Y: 8
- Relative To: Bottom
Unit Frame
- Size X: 245
- Size Y: 230
- Offset X: -325
- Offset Y: 8
- Relative To: Bottom
Control Groups
- Size X: 90
- Size Y: 60
- Offset X: 390
- Offset Y: 235
- Relative To: Bottom Left
- Equation: To move to the right (Offset X + 75)
Finished Product
To view and download a map containing all this information: Measuring Frames
