Difference between revisions of "Custom Unit Textures"
(Created page with "In this tutorial, we're going to be covering a couple of ways you can replace a unit's texture. The first way simply replaces the texture with another one. The second method poin...") |
m |
||
| Line 8: | Line 8: | ||
[[File:Custom unit textures 2.PNG|600px|center|Are you reddy?]] | [[File:Custom unit textures 2.PNG|600px|center|Are you reddy?]] | ||
| − | Finally we will replace the texture in GalaxyEdit. Open up the [[Import]] | + | Finally we will replace the texture in GalaxyEdit. Open up the [[GalaxyEdit#Import_Module|Import module]] (F9), and go to Data->Import Files (Ctrl-I). Navigate to your textures, select them, and import them. Make sure they're in Assets/Textures/ inside the map. Save the map, and exit the importer. Place a dark templar or three in the terrain module, and go test them out! (Note:The changes won't show up in the editor with this method, as the editor seems to look in the Liberty mod for this information when you use the replacement method. However, they should show up fine ingame). |
[[File:Custom unit textures 3.PNG|600px|center|Looking good]] | [[File:Custom unit textures 3.PNG|600px|center|Looking good]] | ||
[[Category:StarCraft II]] | [[Category:StarCraft II]] | ||
[[Category:Tutorials]] | [[Category:Tutorials]] | ||
Revision as of 00:09, 7 April 2011
In this tutorial, we're going to be covering a couple of ways you can replace a unit's texture. The first way simply replaces the texture with another one. The second method points the data editor at a differently named texture to use for that model.
Replacement Method
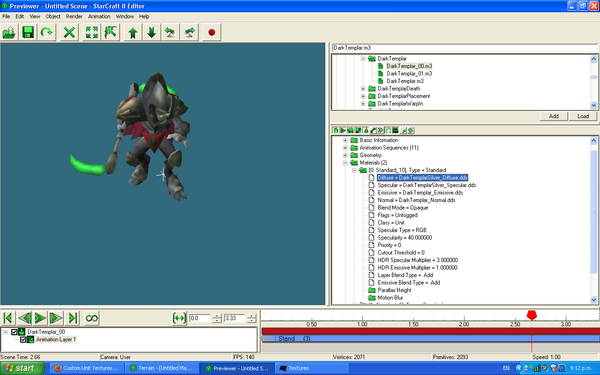
First, export the texture from the MPQ. In this case, we'll be using the Protoss Dark Templar textures, and we'll be editing the diffuse map, and the emissive map. This is found in the Liberty.SC2Mod folder, in the base.SC2Assets MPQ. Navigate into Assets/Textures/ and put a search mask for dark*. As you should be able to see, there's a .dds called darktemplar_diffuse.dds. So, of course, we export that, edit it, and place it into our map, right? WRONG. If you tried this, nothing would change. Now, open up the Previewer (Ctrl-Shift-V in GalaxyEdit). Navigate to the Dark Templar unit, and take a look at the materials the .m3 looks for. As seen in the screenshot, it looks for the DarkTemplarSilver_Diffuse.dds! Not all units are like this, but it's a good idea to make sure you're trying to replace the correct file.
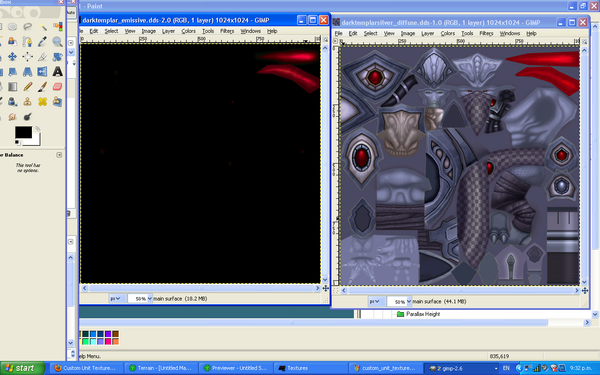
Now, back in your MPQ editor, export DarkTemplarSilver_Diffuse.dds, and DarkTemplar_emissive.dds. Open them up in your image editor, and modify it however you want. In this case, I've made the blades glow red, by editing the emissive map. I've also edited the diffuse map to make other parts of the templar redder.
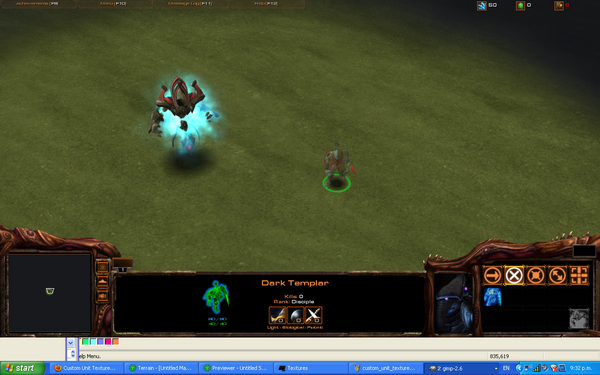
Finally we will replace the texture in GalaxyEdit. Open up the Import module (F9), and go to Data->Import Files (Ctrl-I). Navigate to your textures, select them, and import them. Make sure they're in Assets/Textures/ inside the map. Save the map, and exit the importer. Place a dark templar or three in the terrain module, and go test them out! (Note:The changes won't show up in the editor with this method, as the editor seems to look in the Liberty mod for this information when you use the replacement method. However, they should show up fine ingame).


