Difference between revisions of "Flashlight"
m |
|||
| Line 71: | Line 71: | ||
[[Category:Tutorials]] | [[Category:Tutorials]] | ||
[[Category:Triggers]] | [[Category:Triggers]] | ||
| + | [[Category:Video Tutorials]] | ||
Revision as of 23:44, 13 December 2010
There are many ways to create a flashlight effect, and the best choice depends on what design the programmer wishes to have. Generally, the shape of a flashlight is a cone, with the smaller point originating from the unit, and the larger end stretching out to the furthest point of vision.
The following system is very useful in the way that it doesn't require any Points or Regions. Also, it is completely done through one small trigger. However, make sure you set the unit Sight Radius to 0 (in the Data Editor, under the Unit tab).
Flashlight With Triggers
There are two main aspects to a flashlight design: length and expanding size. Expanding size would be the width of the light (determined by an expanding rate), while length would be how far the flashlight reveals in front of the unit. Other variables to consider are the unit group, the flashlight's initial size, the unit's facing direction, and the unit's current position.
When creating a flashlight effect, it is required to disable the units' sight radius first. To do this, simply locate the unit in the data editor and change the sight radius field to 0.
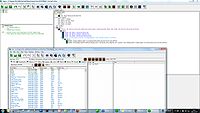
An example implementation of a flashlight system is shown below (or you can look at this more explicit picture):
Variables:
- counter: A simple counter to iterate through the for loop.
- flashlightHolders: The unit group on which the trigger will be applied. All units holding a flashlight, so to speak.
- flashlightLength: How far in front of the unit a flashlight reveals.
- flashlightInitialSize: The width of the flashlight before it begins expanding.
- flashlightExpandingSize: The speed at which a flashlight grows. A higher number makes a greater speed, and results in a more rounded shape.
- unitFacingAngle: The direction in which the flashlight is pointed, as dictated by the facing direction of a unit.
- unitPosition: The current location of a unit.
Actions:
- Unit Group: Picks all flashlight holders and performs the following action for each one.
- Variable - Set unitPosition: Sets unitPosition to the unit's current position.
- Variable - Set unitFacingAngle: Sets unitFacingAngle to the direction the unit is currently facing. General - For each integer counter from 0 to flashlightLength with increment 1, do (Actions)
- counter: This number increments by one for every loop.
- flashlightLength: The loop ends when this number has been reached. Visibility - Reveal (Region((unitPosition offset by counter towards unitFacingAngle degrees)
- unitPosition: The current location of the unit.
- counter: An incrementing number that determines distance from unitPosition in the direction of unitFacingAngle.
- unitFacingAngle: The direction in which the unit is currently facing. Note: To set up this action, you must choose "Convert Circle to Region" followed by "Point with Polar Offset"
- flashlightInitialSize: The base size for the flashlight.
- counter * flashlightExpandingSize: The expansion of the flashlight's width.
Visibility (continued) - (flashlightInitialSize + (counter * flashlightExpandingSize)))) for player 1 for 0.06 seconds and Do not check cliff level
The local variables can be easily adjusted to change the shape and size of the flashlight. Other variables may also be introduced to the vision formula to create differing effects. An example of this is including the unit's size as a local variable, and having it affect the length and expansion of the flashlight.
How it renders
You can see the system in action here:
<youtube>zJDYpQ4jlpg</youtube>
Example Map
If you want to play with the system, or just copy it, here is the map: http://www.staredit.net/?attachment=7422
Please consider giving credits to Roy and the StarEdit Network's community.
A little improvement?
This hasn't been experimented with yet, but adding an OmniLight at the origin of all units to whom this system applies could increase the realism of it.
Flashlight with the Data Editor
Adding a flashlight to a unit using the Data Editor is simply a matter of attaching the "Flashlight" model from the Campaign Dependencies. You can learn more about attaching a model to a unit here.

