Custom UI
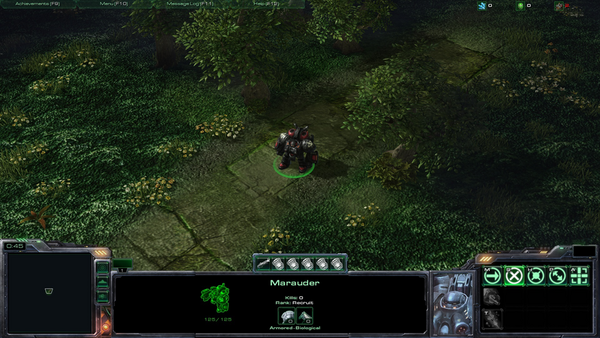
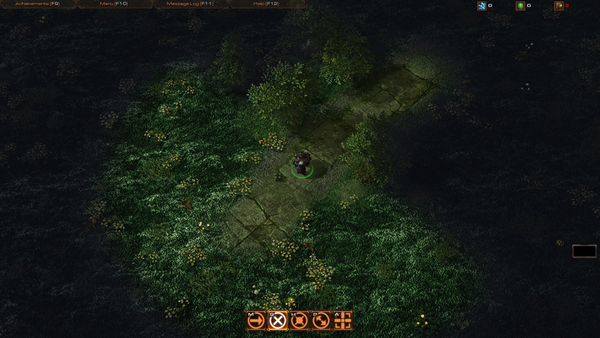
A custom user interface can be created to give a custom map a new look. There are two methods one can use to customize the UI of StarCraft II, and they are not mutually exclusive.
UI Editor
The first method is to use the built-in UI editor. This method is useful when one wants to make a brand new UI from scratch, repositioning all the built-in elements on the screen.
To find any movable UI element, first check out the "GameUI" code. In the list on the left, you can easily jump down to sections of the GameUI code by selecting the overall area of the screen. For example, selecting GameUI > UIContainer > ConsoleUIContainer will jump down to all the elements related to the command panel and minimap.
Creating your own modifications to the base UI can be done by adding your own layout to the list. To do this, go to "Data > Add Layout..." or use Ctrl+L. This creates a new blank set of code for you to add to as you make changes.
Keep in mind that you must have the following on it in order for your code to work properly:
<?xml version="1.0" encoding="utf-8" standalone="yes"?>
<Desc>
</Desc>
From there, you can add any UI frame to it that you wish to override. You can easily find any frame you want in the left-side list and then copy/paste it into your new layout. Remember that all your added code should be between the <Desc>...</Desc> tags.
When you finally decide to edit a frame, there's one more step you need to take before the override will work properly. Let's say you want to modify the minimap. Find the MinimapPanel frame and copy/paste it into your layout. You should have the following:
<Frame type="MinimapPanel" name="MinimapPanel" template="MinimapPanel/MinimapPanelTemplate">
     <Anchor side="Left" relative="$parent" pos="Min" offset="0"/>
     <Anchor side="Bottom" relative="$parent" pos="Max" offset="0"/>
     <Width val="395"/>
     <Height val="327"/>
</Frame>
Just changing this wont be enough to override the base code, because the game doesn't know what this code is supposed to affect just yet. That's because taking it from the GameUI code assumes it is still in that framing structure. As explained above, you can use the list on the left of the UI editor to jump between sections of code when selecting the GameUI. This shows you the general framing structure of the GameUI. This is important because we need to include the path of frames in the name="MinimapPanel" section of our minimap code. Because we can find the minimap frame in GameUI > UIContainer > ConsoleUIContainer, we need to change the name of our frame to find this path. Therefore using the following will properly allow you to override the minimap for your custom UI:
<Frame type="MinimapPanel" name="GameUI/UIContainer/ConsoleUIContainer/MinimapPanel" template="MinimapPanel/MinimapPanelTemplate">
     <Anchor side="Left" relative="$parent" pos="Min" offset="0"/>
     <Anchor side="Bottom" relative="$parent" pos="Max" offset="0"/>
     <Width val="395"/>
     <Height val="327"/>
</Frame>
Frame Position
Positioning a frame on the screen requires the use of an <Anchor> tag.
Anchor tags can be modified with the following settings:
- side - Left, Right, Top, Bottom
- Determines the side of the frame you want to position.
- relative - $this, $parent
- Determines what this anchor is attached to.
- $parent refers to the "parent" frame which it would be connected to. Most of the time, this will be the value you use.
- $this resets the anchor.
- Determines what this anchor is attached to.
- pos - Min, Mid, Max
- Determines where the frame will connect to on the parent frame.
- Min refers to the minimum point
- Mid refers to the center point
- Max refers to the maximum point
- Determines where the frame will connect to on the parent frame.
- offset - #
- Determines the number of pixels that the frame should be adjusted in relation to the "pos." This can be a negative number as well.
For example, take a look at the base code for the Minimap:
<Frame type="MinimapPanel" name="MinimapPanel" template="MinimapPanel/MinimapPanelTemplate">
     <Anchor side="Left" relative="$parent" pos="Min" offset="0"/>
     <Anchor side="Bottom" relative="$parent" pos="Max" offset="0"/>
     <Width val="395"/>
     <Height val="327"/>
</Frame>
- The first "Anchor" is basically managing where the Minimap is set horizontally. It is set to the Left side, connected to the "$parent" frame (in this case, $parent refers to the entire game's window), positioned at the "Min" point (so it sits on the left of the screen), and has no offset.
- The second "Anchor" is basically managing where the Minimap is set vertically It is set to the Bottom side, connected to the "$parent" frame again, positioned at the "Max" point (so it appears at the bottom of the screen, and actually on screen for that matter), and has no offset.
If you wanted to override this and move it to the top right of the frame instead, you would include the following:
<Frame type="MinimapPanel" name="GameUI/UIContainer/ConsoleUIContainer/MinimapPanel" file="GameUI">
  <Anchor side="Top" offset="0" pos="Min" relative="$parent"/>
  <Anchor side="Right" offset="0" pos="Max" relative="$parent"/>
  <Anchor side="Left" offset="0" pos="Min" relative="$this"/>
  <Anchor side="Bottom" offset="0" pos="Max" relative="$this"/>
</Frame>
You may be wondering why you have to include <Anchors /> for each side. This is because you are not only adding Anchors to move it to side=Top and side=Right, but also changing the existing side= Anchors included in the GameUI file. If you don't add the side=Left and side=Bottom Anchors to override the base settings, then your MinimapPanel will not be where you want it.
Offsets
You will need to use offsets to set the position of a frame at a specific point on the screen.
- If you want to move it towards the left, decrease the offset of the left or right anchor.
- If you want to move it towards the right, increase the offset of the left or right anchor.
- If you want to move it towards the top, decrease the offset of the top or bottom anchor.
- If you want to move it towards the bottom, increase the offset of the top or bottom anchor.
For example, to move the Minimap up 50 pixels and 30 pixels to the right, you would use the following:
<Anchor side="Bottom" relative="$parent" pos="Max" offset="50"/>
<Anchor side="Left" relative="$parent" pos="Min" offset="30"/>
Hiding Frames
To hide a frame using the override method (rather than hiding it via Triggers), just include the following:
<Visible val='False'/>
Yes, it is that simple. Place that between the <Frame name="..." type="..."> and </Frame> tags and you should be good to go.
Note: You can't hide the friends button with this method. However, you can offset it until it's offscreen, if it is necessary to not have it visible.
Bottom Black Bar
If you are hiding or moving elements on the bottom of the UI (i.e. the info panel) and notice that there is a lingering black bar on the bottom of the screen, this can be removed as well with the following:
 <Frame type="Frame" name="MenuBarConsoleAnchor">
      <Anchor side="Top" relative="$this" pos="Min" offset="0"/>
      <Anchor side="Left" relative="$this" pos="Min" offset="0"/>
      <Anchor side="Bottom" relative="$parent/$parent/$parent" pos="Max" offset="-600"/>
      <Anchor side="Right" relative="$parent/$parent/$parent" pos="Max" offset="-50"/>
 </Frame>
Adding an Image Frame
If you want to further customize the frames you move, you can add new borders to them.
- This section is a stub. You can help out by adding more information.
Samples
Here are a few samples of common UI modifications.
Centered Inventory Buttons
This will center the Inventory buttons on the screen, and place them above the Info Panel.
| Copy the following code into your new layout file |
|---|
   <Frame type="InventoryPanel" name="GameUI/UIContainer/ConsoleUIContainer/InventoryPanel" file="GameUI">
       <Frame type="CommandTooltip" name="InventoryTooltip">
           <Anchor side="Bottom" relative="$parent" pos="Max" offset="-330"/>
           <Anchor side="Left" relative="$parent" pos="Mid" offset="0"/>
           <Anchor side="Right" relative="$parent" pos="Mid" offset="0"/>
       </Frame>

       <Frame type="InventoryContainer" name="InventoryButtons">
           <Anchor side="Bottom" relative="$parent" pos="Max" offset="-210"/>
           <Anchor side="Left" relative="$parent" pos="Mid" offset="0"/>
           <Anchor side="Right" relative="$parent" pos="Mid" offset="0"/>

           <Frame type="CommandButton" name="Button05">
               <Anchor side="Bottom" relative="$parent" pos="Max" offset="-28"/>
               <Anchor side="Right" relative="$parent" pos="Max" offset="-20"/>
               <Width val="50"/>
               <Height val="50"/>
           </Frame>
           <Frame type="CommandButton" name="Button04">
               <Width val="50"/>
               <Height val="50"/>
           </Frame>
           <Frame type="CommandButton" name="Button03">
               <Width val="50"/>
               <Height val="50"/>
           </Frame>
           <Frame type="CommandButton" name="Button02">
               <Width val="50"/>
               <Height val="50"/>
           </Frame>
           <Frame type="CommandButton" name="Button01">
               <Width val="50"/>
               <Height val="50"/>
           </Frame>
           <Frame type="CommandButton" name="Button00">
               <Width val="50"/>
               <Height val="50"/>
           </Frame>
           <Frame type="Frame" name="ContainerSizeFrame">
               <Anchor side="Top" relative="$parent/Button00" pos="Min" offset="-18"/>
               <Anchor side="Bottom" relative="$parent/Button00" pos="Max" offset="28"/>
               <Anchor side="Left" relative="$parent/Button00" pos="Min" offset="-20"/>
               <Anchor side="Right" relative="$parent/Button05" pos="Max" offset="20"/>
           </Frame>

           <Frame type="Image" name="BackgroundImage">
               <Anchor side="Top" relative="$parent" pos="Min" offset="0"/>
               <Anchor side="Bottom" relative="$parent" pos="Max" offset="0"/>
               <Anchor side="Left" relative="$parent" pos="Min" offset="0"/>
               <Anchor side="Right" relative="$parent" pos="Max" offset="0"/>
               <Texture val="@@UI/RevealPanelBorder"/>
               <TextureType val="Border"/>
               <RenderPriority val="500"/>
           </Frame>
       </Frame>
   </Frame>
|
MOBA Command Card
It is common to see MOBA games (League of Legends, Heroes of Newerth, etc.) center 4 or 5 buttons near the bottom of the screen. This layout code will move the first 5 buttons on the command card to the center of the screen, and position them near the bottom.
Note that to get the full effect, you would either need to move around or use Triggers to hide the following panels:
- UI - Hide Info Panel for (All players)
- UI - Hide Control Group Panel for (All players)
- UI - Hide Console Panel for (All players)
- UI - Hide Inventory Panel for (All players) (Optional)
- UI - Hide Mission Time Panel for (All players) (Optional)
- UI - Hide Minimap Panel for (All players) (Optional)
| Copy the following code into a new SC2Layout file |
|---|
  <Frame type="CommandPanel" name="GameUI/UIContainer/ConsoleUIContainer/CommandPanel" file="GameUI">
    <BatchImages val="true"/>
    <BatchText val="true"/>
    <Anchor side="Bottom" relative="$parent" pos="Max" offset="0"/>
    <Anchor side="Left" relative="$parent" pos="Mid" offset="-600"/>
    <Anchor side="Right" relative="$parent" pos="Mid" offset="600"/>
    <Width val="385"/>
    <Height val="130"/>
       <Frame type="CommandTooltip" name="CommandTooltip">
           <Anchor side="Bottom" relative="$parent" pos="Max" offset="-130"/>
           <Anchor side="Right" relative="$parent" pos="Mid" offset="220"/>
       </Frame>
       <Frame type="CommandButton" name="CommandButton00" template="CommandButton/CommandButtonTemplate">
           <Anchor side="Top" relative="$parent" pos="Min" offset="30"/>
           <Anchor side="Left" relative="$parent" pos="Min" offset="#CommandButtonGap"/>
       </Frame>
       <Frame type="CommandButton" name="CommandButton05" template="CommandButton/CommandButtonTemplate">
           <Visible val='False'/>
           <Anchor side="Top" relative="$parent/CommandButton00" pos="Min" offset="0"/>
           <Anchor side="Left" relative="$parent/CommandButton00" pos="Max" offset="#CommandButtonGap"/>
       </Frame>
       <Frame type="CommandButton" name="CommandButton10" template="CommandButton/CommandButtonTemplate">
           <Visible val='False'/>
           <Anchor side="Top" relative="$parent/CommandButton05" pos="Min" offset="0"/>
           <Anchor side="Left" relative="$parent/CommandButton05" pos="Max" offset="#CommandButtonGap"/>
       </Frame>
  </Frame>
|
Dialogs
- This section is a stub. You can help out by adding more information.
Work in progress.

