GalaxyEdit
GalaxyEdit is the standard map editor for StarCraft II. This page contains basic information on the editor's usage. To access GalaxyEdit on Windows, go to Start->All Programs->Starcraft II->Starcraft II Editor
General interface
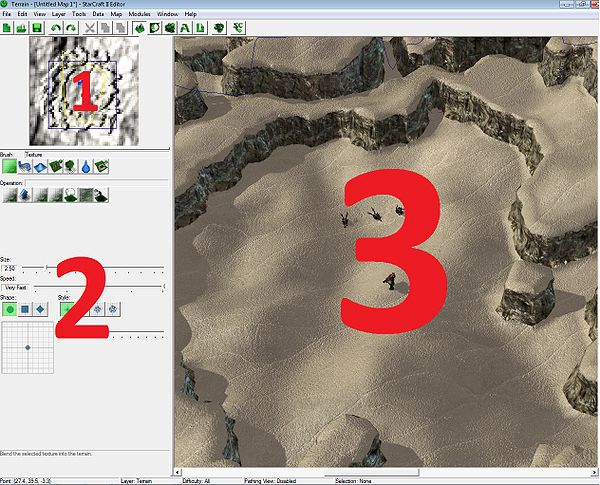
This is an overview of what you're going to find when you open up the Galaxy Editor. You will find this interface on all of the different modules.
- Opens the Terrain Module.
- Opens the Trigger Module.
- Opens the Data Editor Module.
- Opens the Text Module.
- Opens the Import Module.
- Opens the Overview Manager.
- Runs StarCraft II and tests your map.
Modules
These are the different "sections" of the editor.
Terrain Module
- The minimap showing an overview of your map.
- This is where the different layers functions will show up.
- The 3D view of your map.
Layers
These only pertain to the Terrain Module. These are all the things that physically have to do with your map.
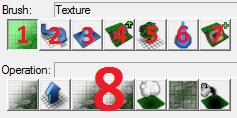
Terrain layer (T)
- Applies textures to the terrain.
- Creates roads.
- Transforms the shape of the terrain with various tools.
- Raise and lowers cliffs.
- Creates foliage (kind of buggy).
- Adds water tiles.
- Add terrain objects
- These are all of the various "sub-tools" for all of the above tools. They're pretty easily figured out.
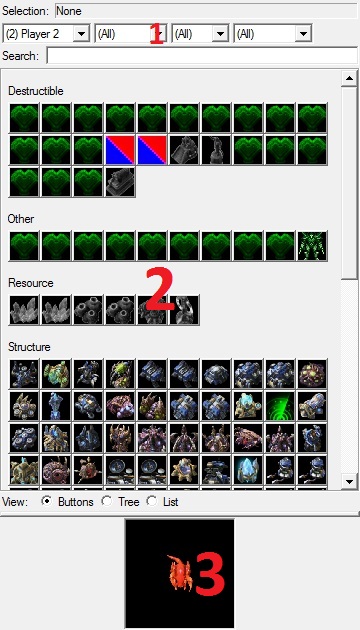
Units layer (U)
- Various filters, and a search bar to dwindle your selections.
- Where you select what unit you would like to place.
- Unit preview.
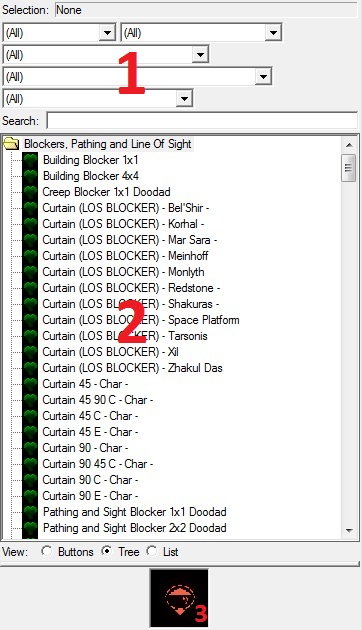
Doodads layer (D)
- Various filters, and a search bar to dwindle your selections.
- Where you select what doodad you would like to place.
- Doodad preview.
Points layer (P)
- Creates a normal point. Only functional on the X and Y axes.
- Creates a Start Location. A must for your melee maps.
- Creates a sound emitter. Haven't used it yet. Sounds pretty much self explanatory.
- Creates a 3D point, which is functional on all three axes, X, Y, Z. (Takes into account height)
Regions layer (R)
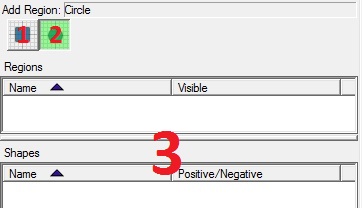
- Places a square shape.
- Places a circle shape.
- Remember, you can include multiple shapes in a single region.
Cameras layer (C)
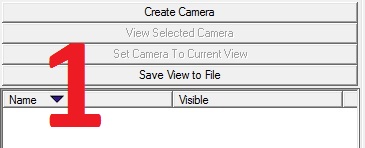
- Here you can create a camera object which you can utilize in your triggers. Self-explanatory buttons here...
See the Cameras wiki for more informations.
Pathing layer (H)
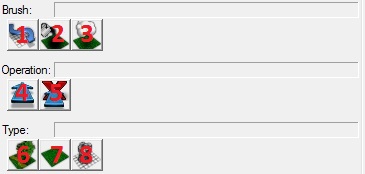
- Paints the type of pathing you select with 6-8.
- Dynamic pathing fill? The editor says: "Place points which block pathing for all terrain on the same cliff level as the point."
- No-Fly zones. Blocks air units.
- For #1, creates pathing for 6-8.
- For #1, removes pathing for 6-8.
- For #1, "No Pathing" pathing. Basically where units cannot go.
- For #1, "Ground" pathing. Basically where ground units CAN go.
- For #1, "No Building" pathing. Where you cannot build.
Trigger Module
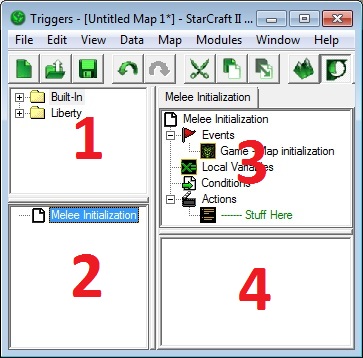
- The different mods that your map uses.
- You can find all of your triggers and variables here.
- The events, local variables, conditions, and actions for a selected trigger.
- The specifics for any event, condition, or action.
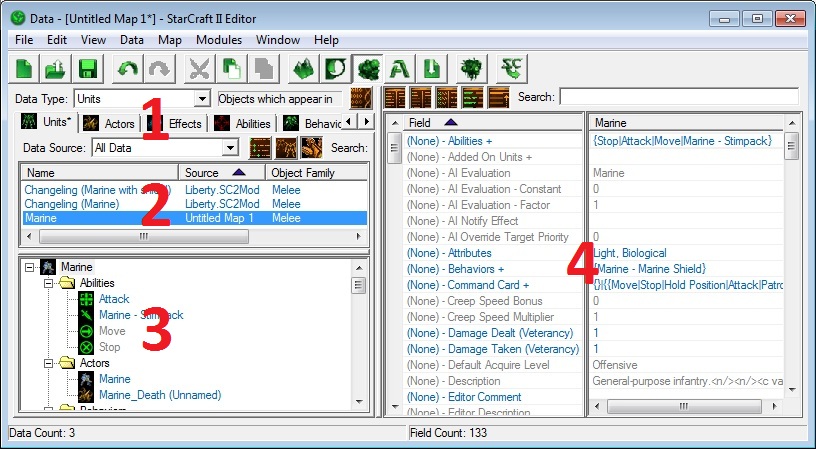
Data Module
- Select what data type you want to work with here.
- Select the object from your selected data type.
- All of the different objects your current selected object is linked to.
- The fields and their respective values for your selected object.
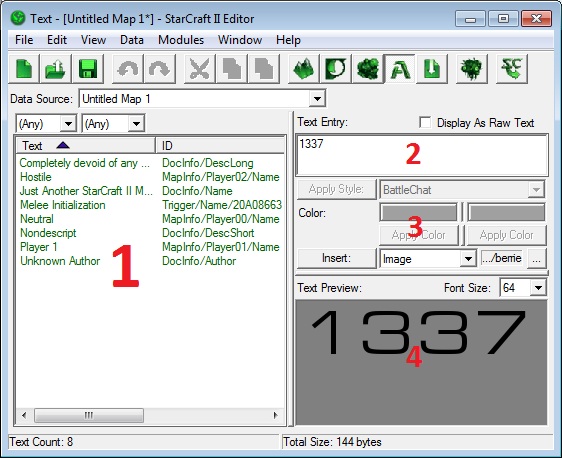
Text Module
- All of the different strings that are in your map.
- The text entry for your selected string.
- Style options that you can apply to your text entry.
- The preview of your text.
Import Module
This one's pretty simple. I don't think it requires a picture. Just import your files by going to: Data->Import Files (Ctrl+I). Make sure you save before exiting this module, or your imports won't be kept!

